📦 Eziseller User Guide
Complete documentation for managing your e-commerce operations
🚀 Getting Started
Sign Up Process
Welcome to Eziseller! Getting started is quick and easy. Follow these steps to create your account and begin selling.
Navigate to the Eziseller registration page to begin your journey.
- Enter your email address
- Create a secure password
- Provide your business name (if applicable)
- Accept terms and conditions
Check your inbox for a verification email and click the confirmation link.
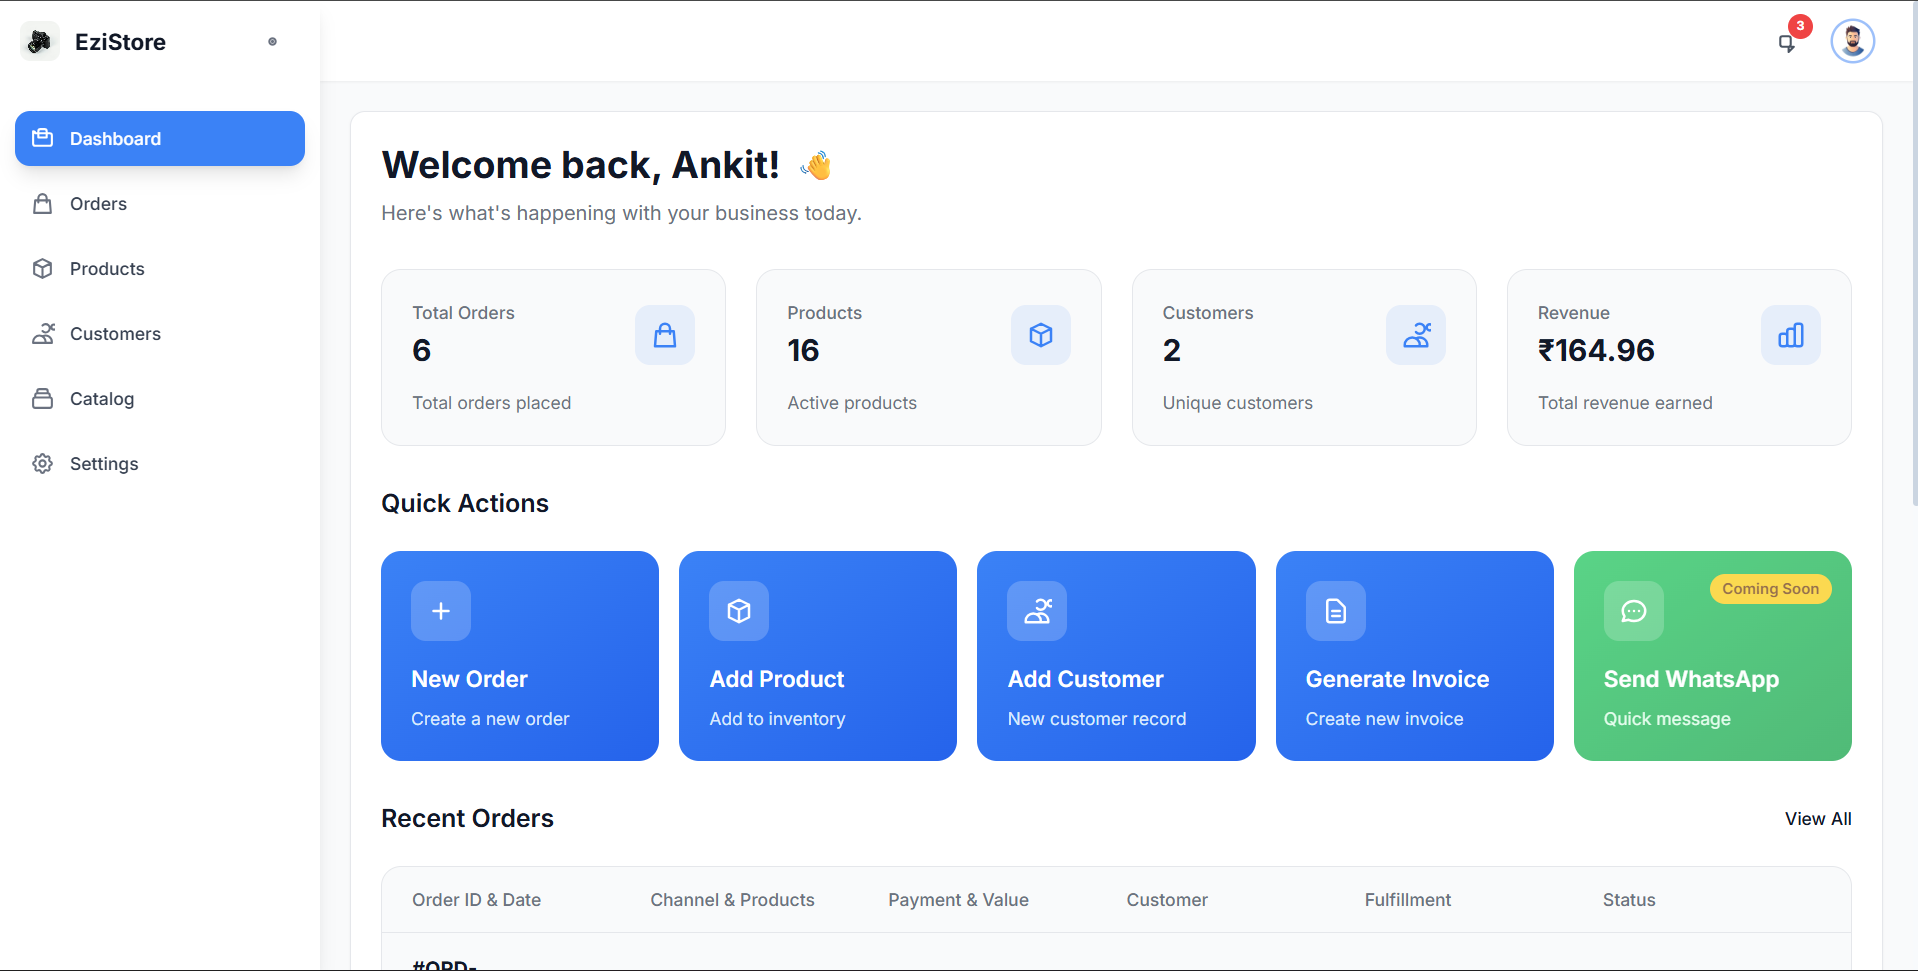
🎯 Onboarding
After signing up, you'll be guided through a quick onboarding process to set up your store and familiarize yourself with Eziseller's features.
What to Expect
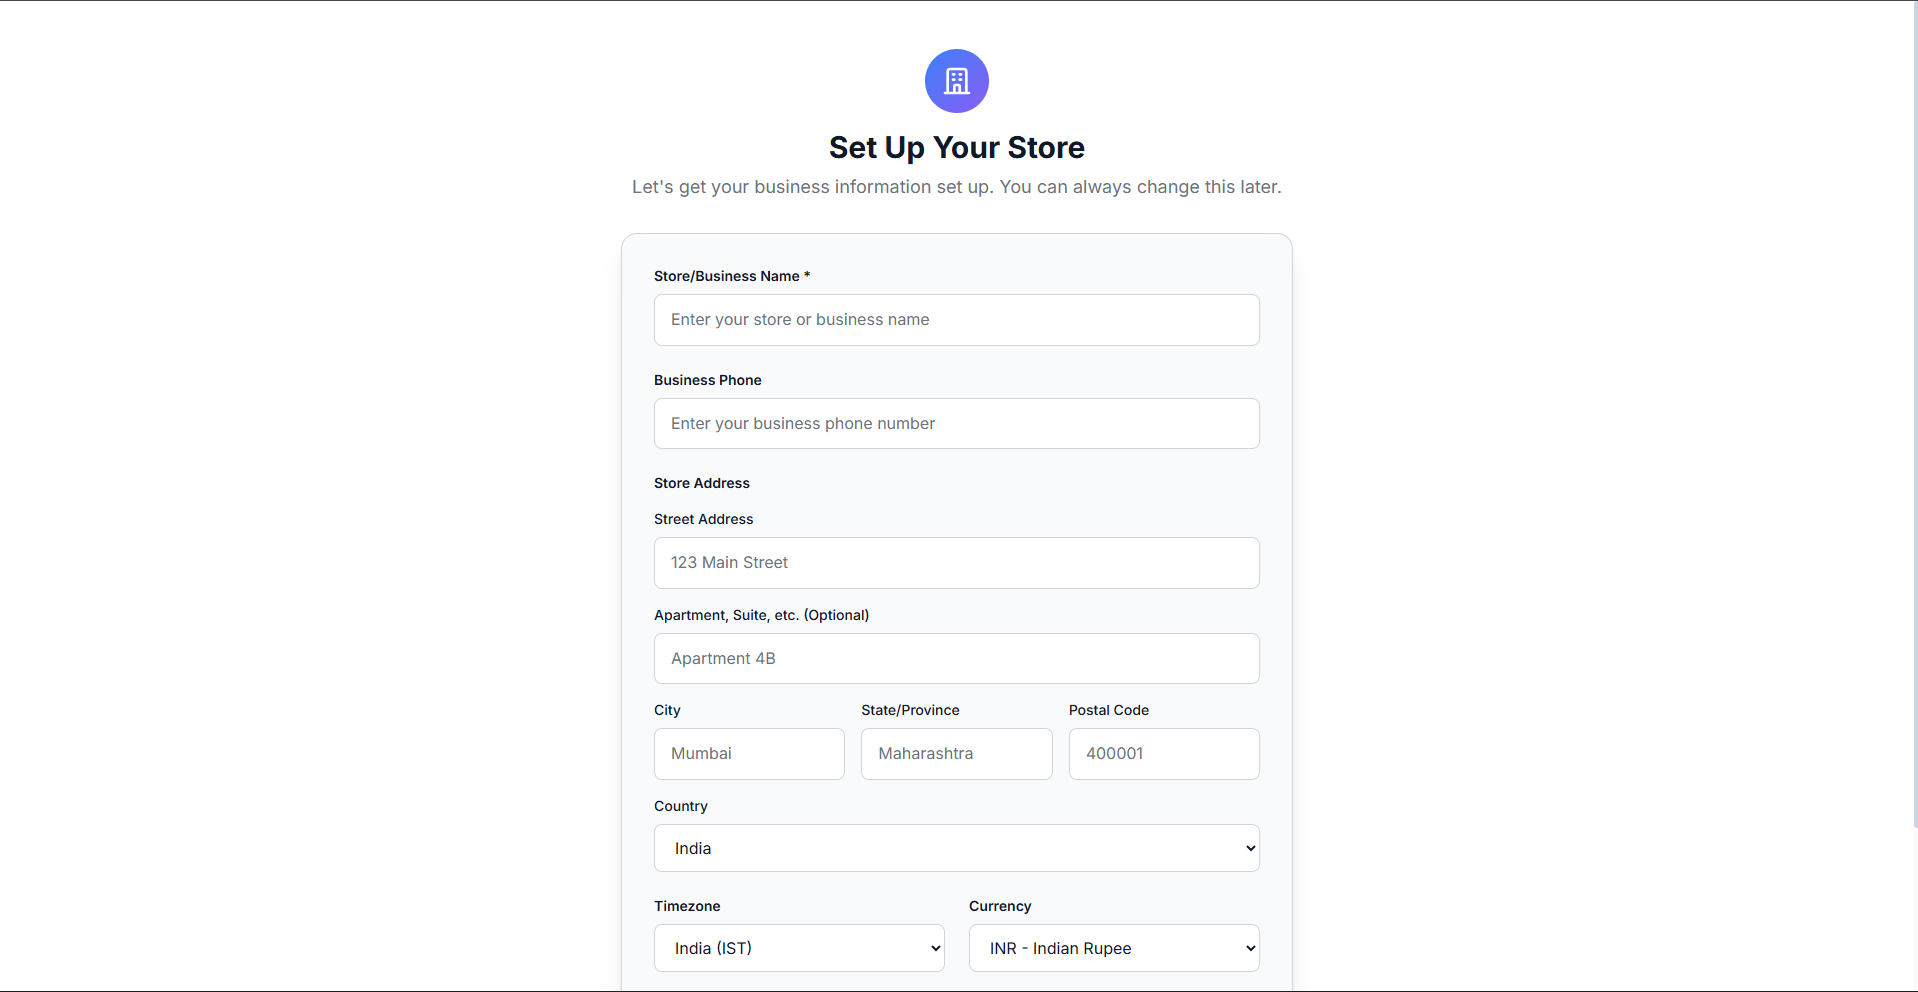
Store Setup
Configure your basic store information and preferences
Feature Tour
Quick walkthrough of key Eziseller features
Quick Start Guide
Learn the essentials to start processing orders immediately
📦 Product Management
Creating Products
Add and manage your product catalog efficiently. Eziseller makes it easy to organize your inventory.
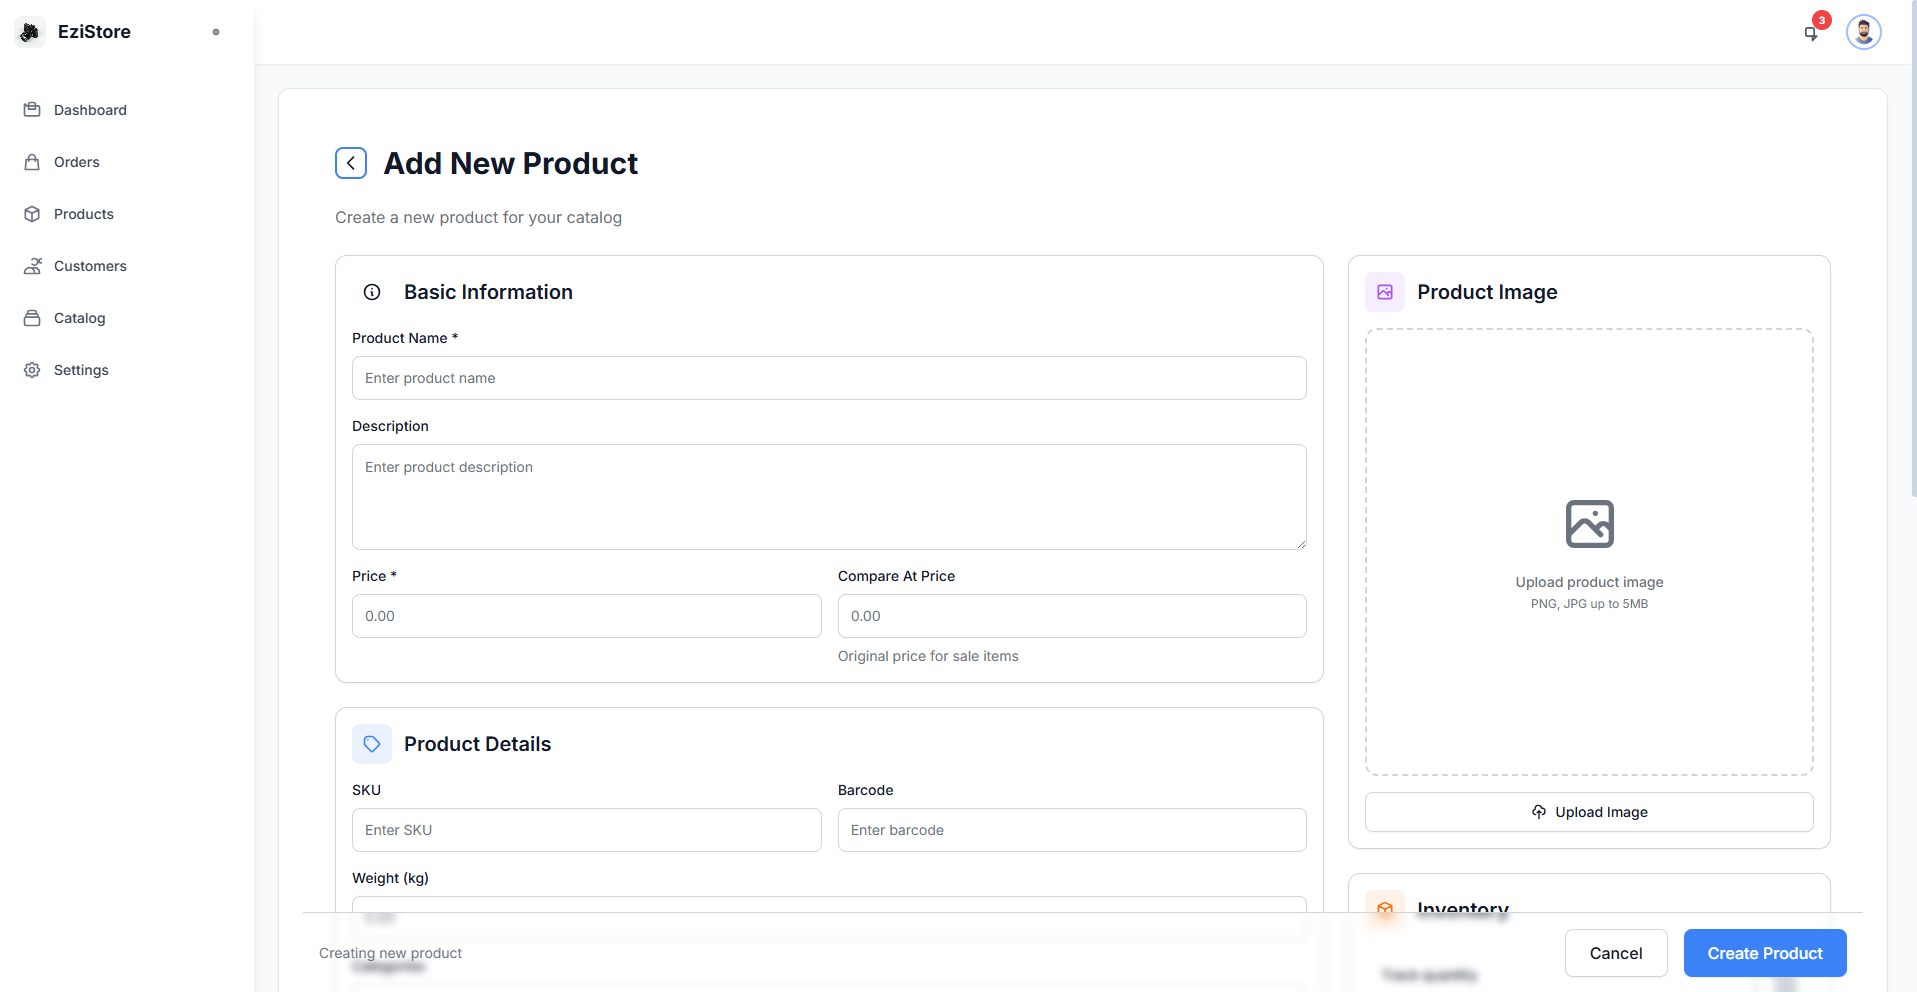
Product Information Fields
- Product Name: Clear, descriptive name for your product
- SKU: Stock Keeping Unit for inventory tracking
- Price: Product pricing information
- Description: Detailed product description
- Images: Product photos (multiple images supported)
- Category: Organize products by category
- Stock Quantity: Available inventory count
- Variants: Size, color, or other variations (if applicable)
Click on the Products section from your dashboard menu.
Start the product creation process.
Complete all required fields with accurate information.
Click Save to add the product to your catalog.
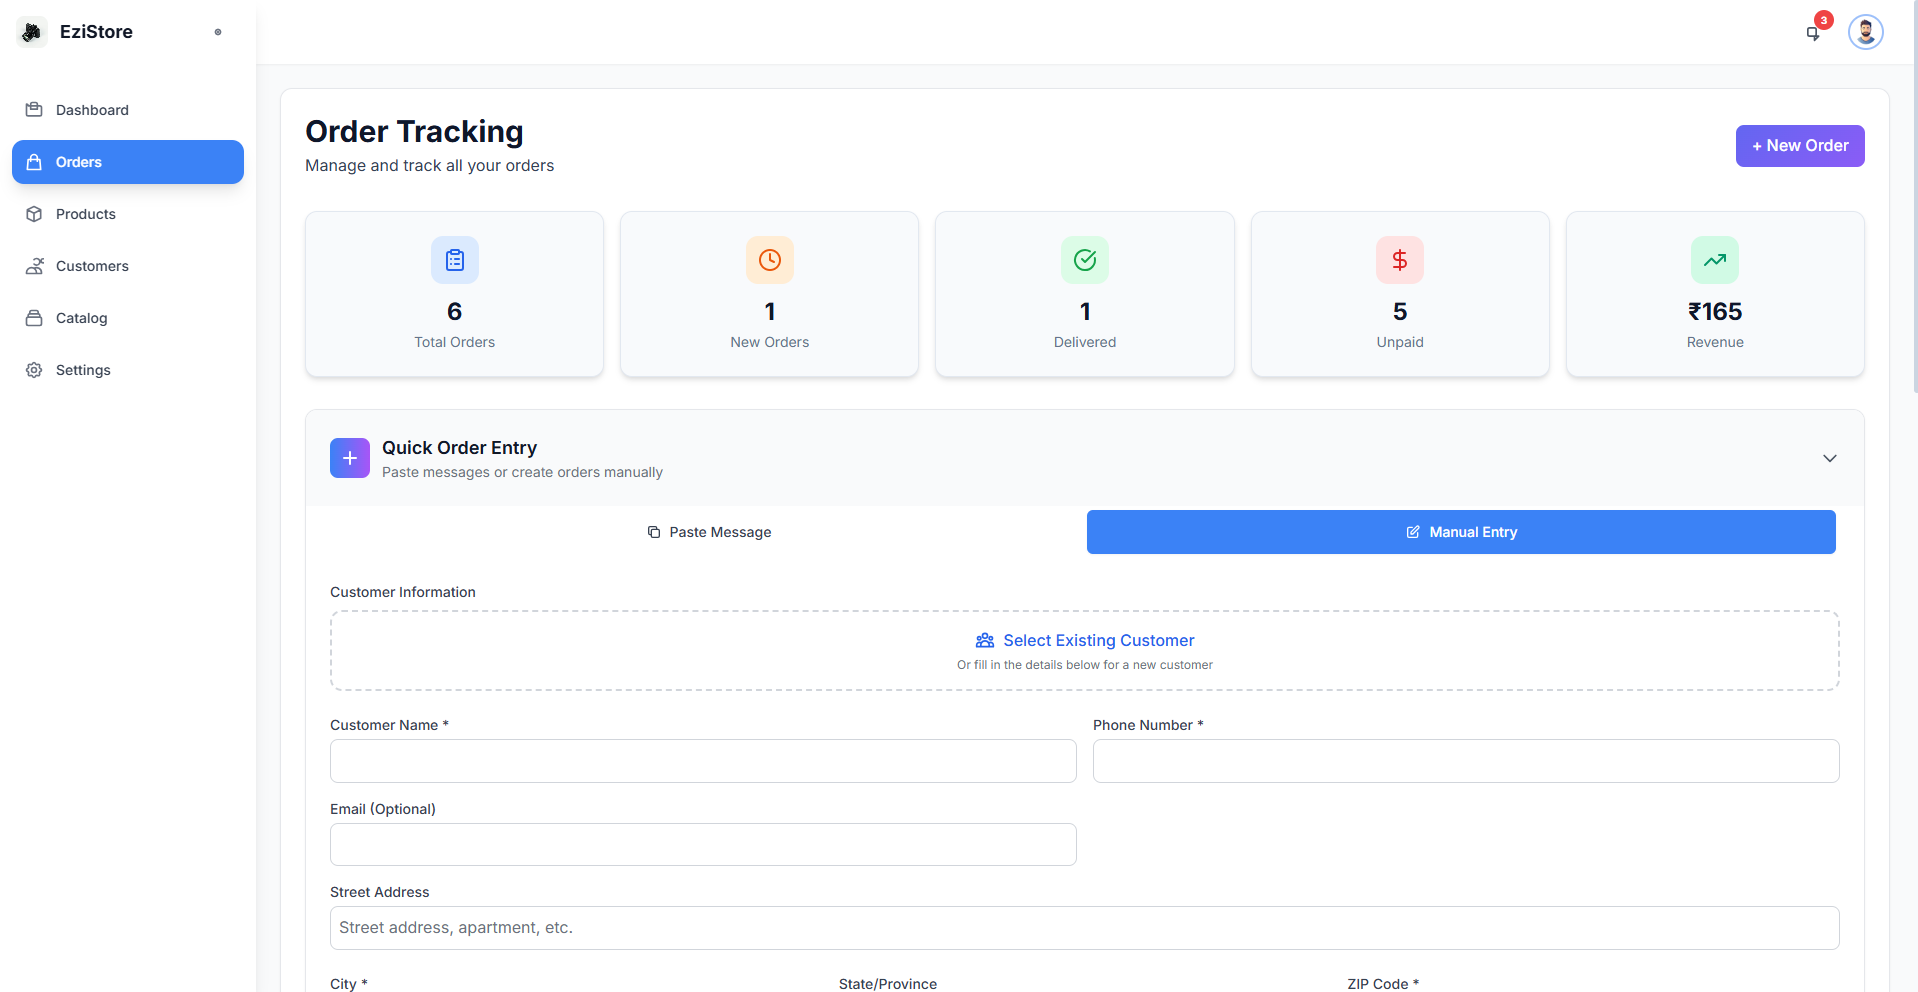
📋 Order Management
Eziseller provides multiple ways to create and manage orders efficiently, whether you're processing bulk orders or individual transactions.
Order Creation Methods
1. Paste Method (Bulk Order Creation)
Quickly create multiple orders by pasting order data from spreadsheets or other sources.
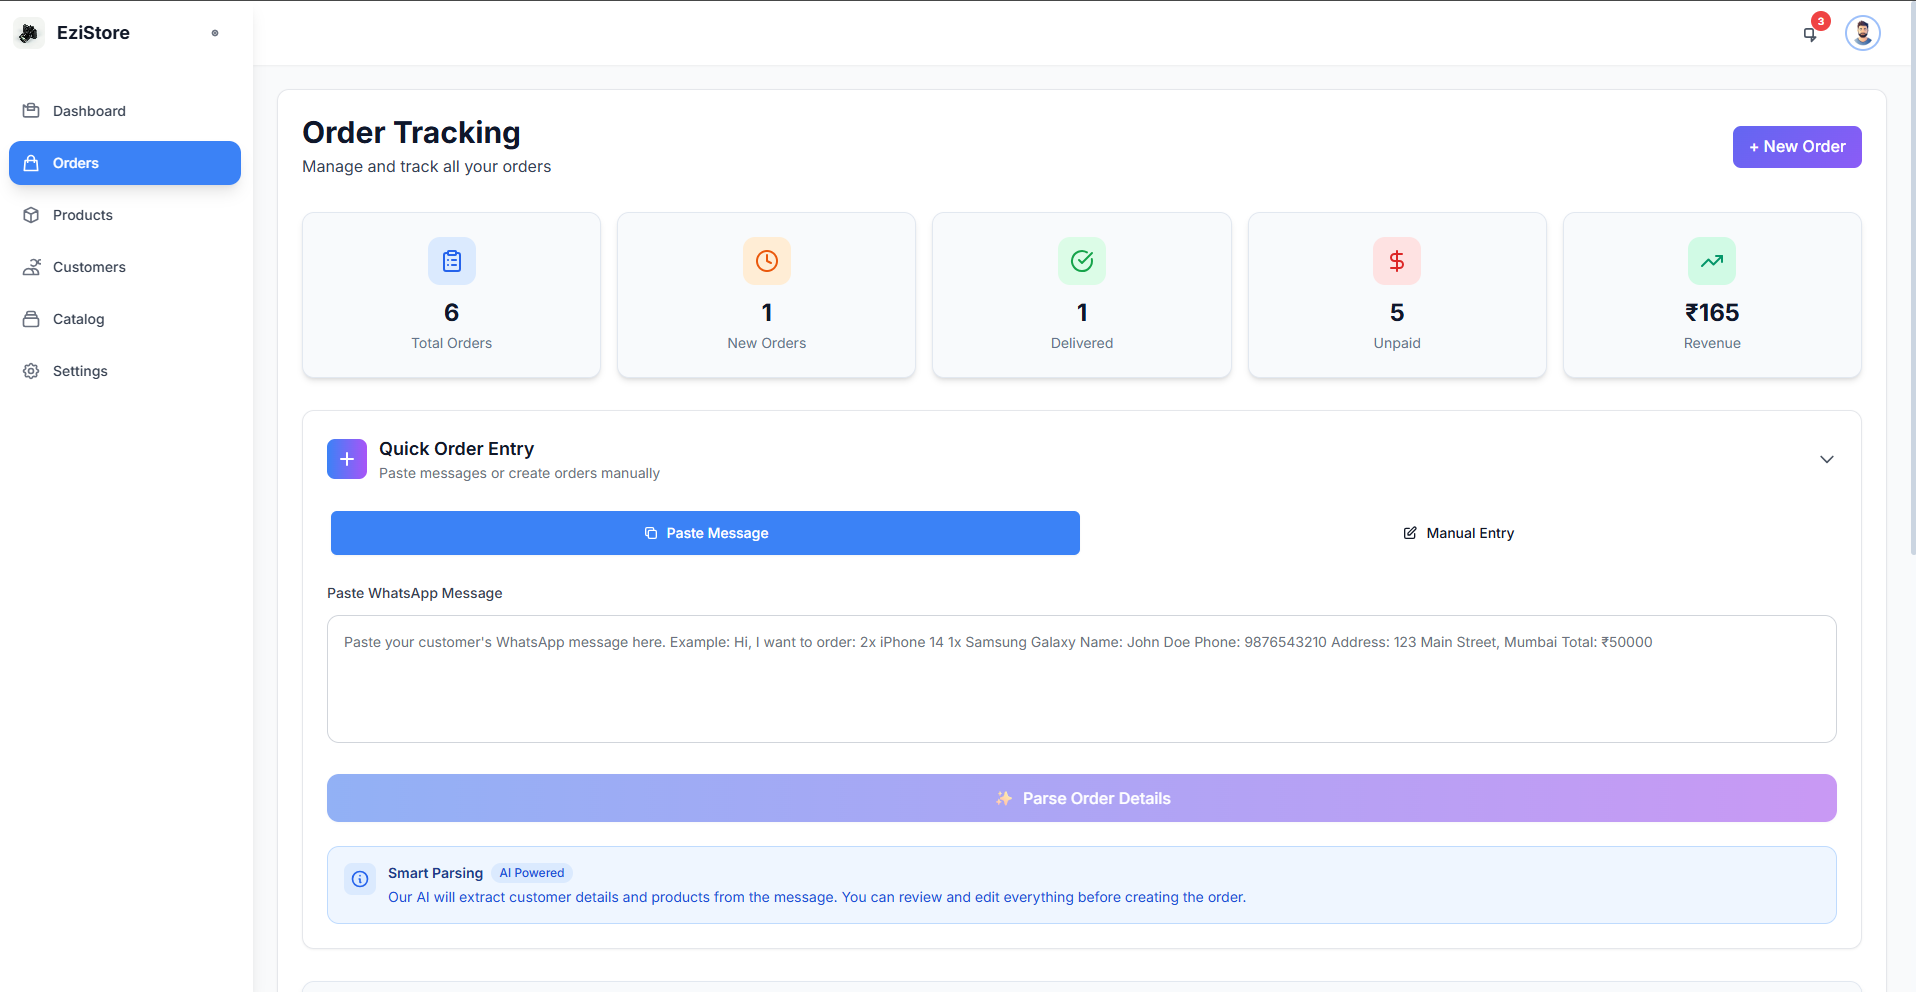
Copy order information from your spreadsheet and paste it into the designated field.
Review the parsed data and confirm to create orders in bulk.
2. Manual Order Creation
Create individual orders one at a time with full control over every detail.
- Customer name
- Contact details
- Shipping address
Select products from your catalog and specify quantities.
Verify all details and click "Create Order".
3. Customer Prefill Option
Save time by auto-filling customer details for returning customers.
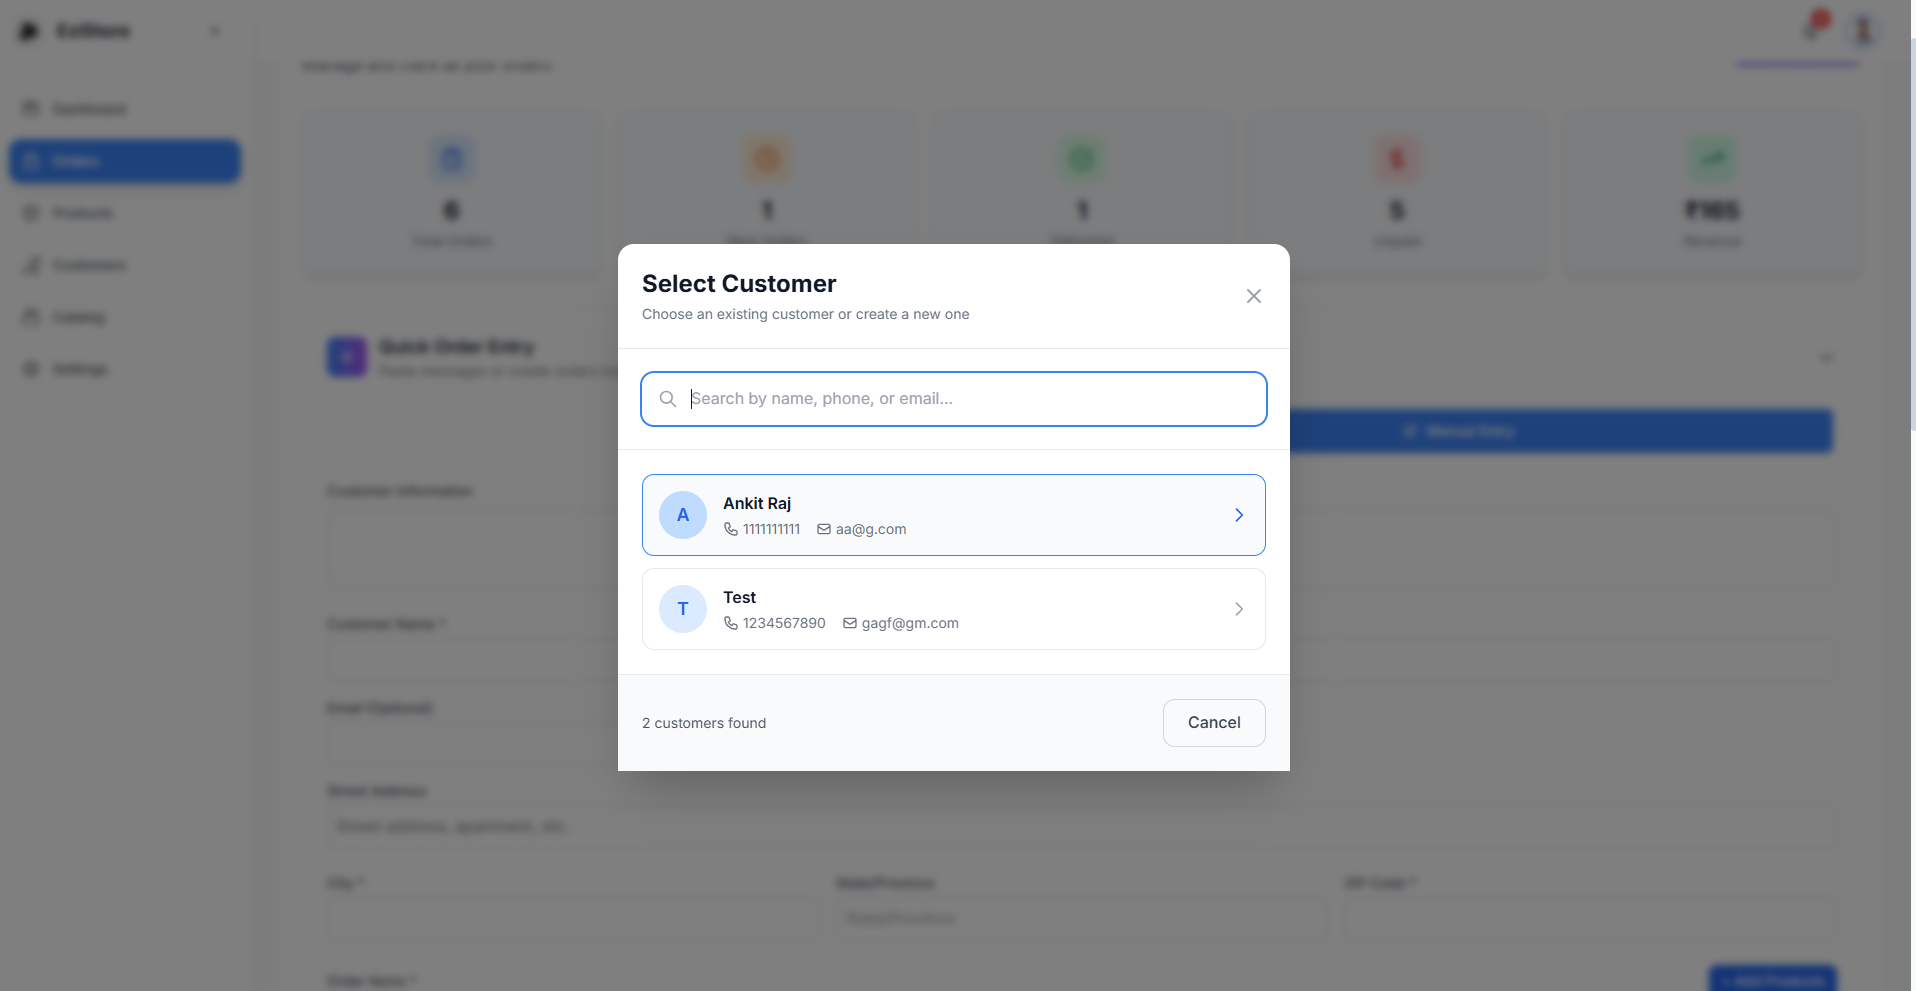
When creating a new order, start typing a customer's name or phone number, and Eziseller will suggest existing customers. Select one to automatically populate their information.
✅ Faster Order Entry
No need to re-enter customer details for repeat buyers
✅ Reduced Errors
Consistent information from your customer database
✅ Better Experience
Quick processing for returning customers
Order Processing
Once orders are created, manage them through their complete lifecycle.
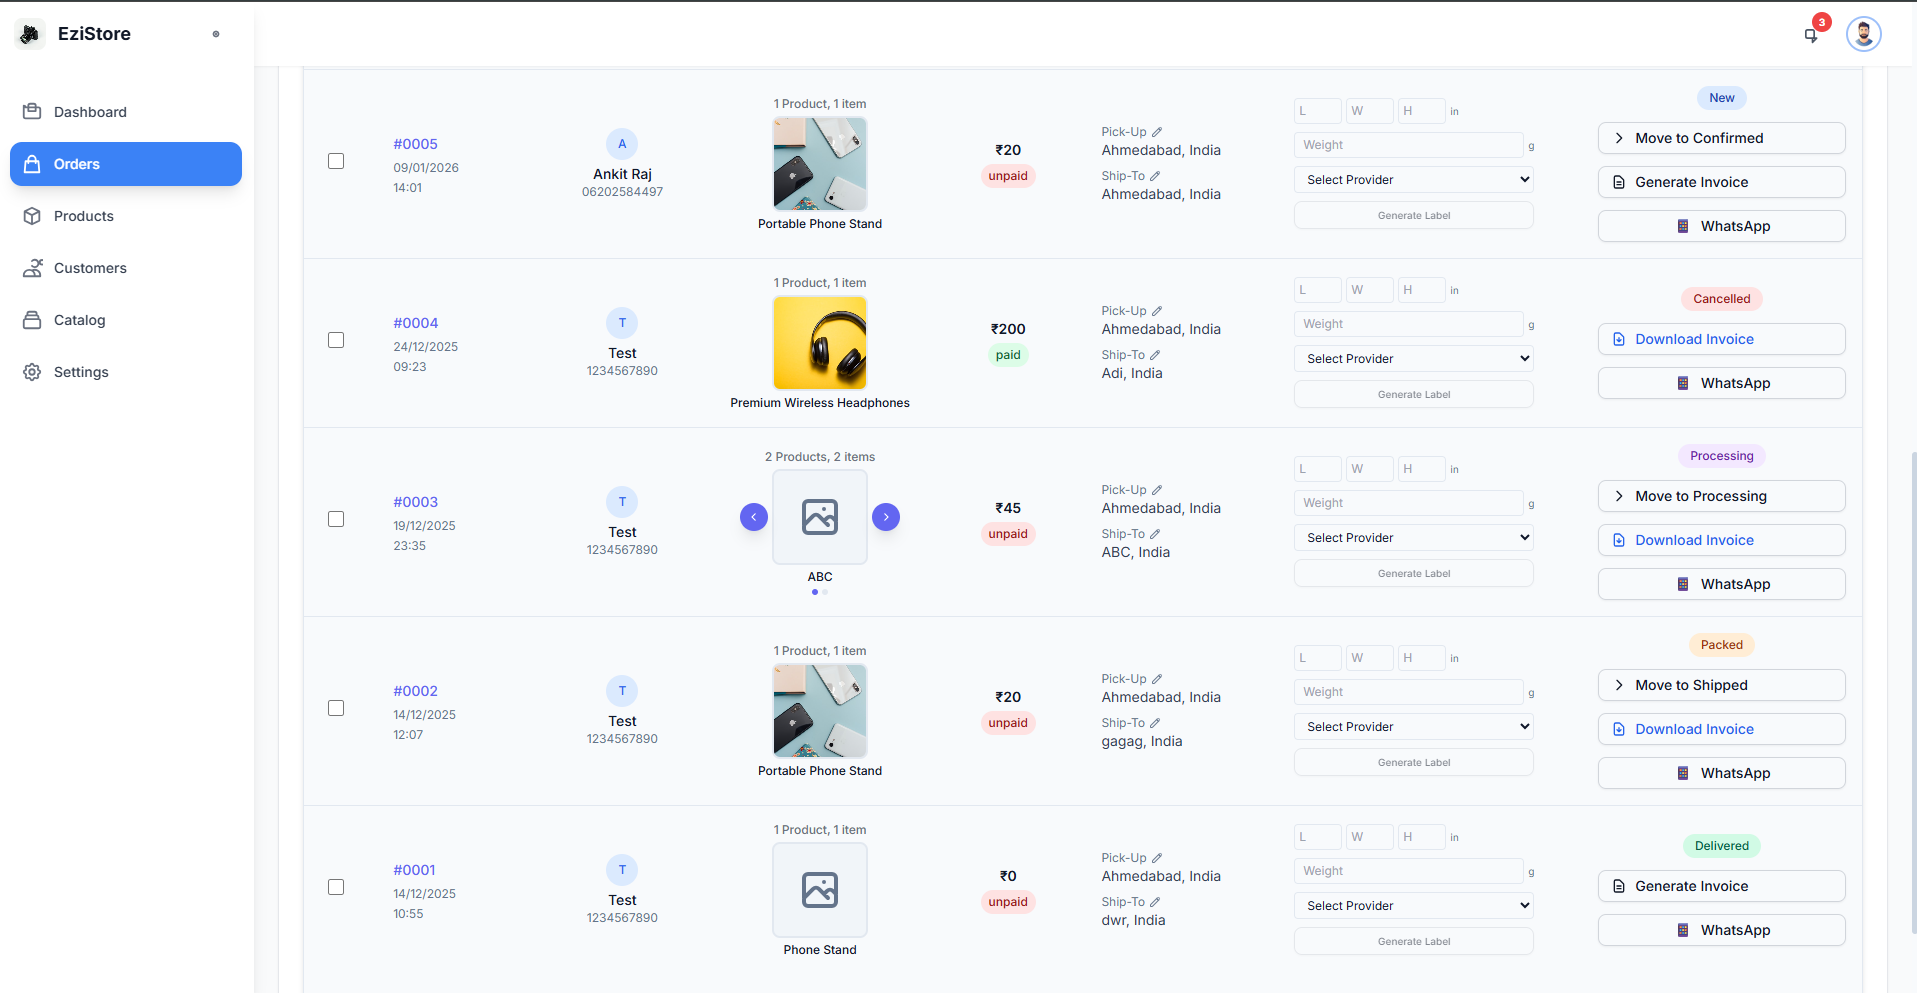
Order Statuses
- Pending: New orders awaiting processing
- Processing: Orders being prepared for shipment
- Shipped: Orders dispatched to customers
- Delivered: Orders successfully delivered
- Cancelled: Orders that were cancelled
Invoice Generation
Generate professional invoices for your orders automatically.
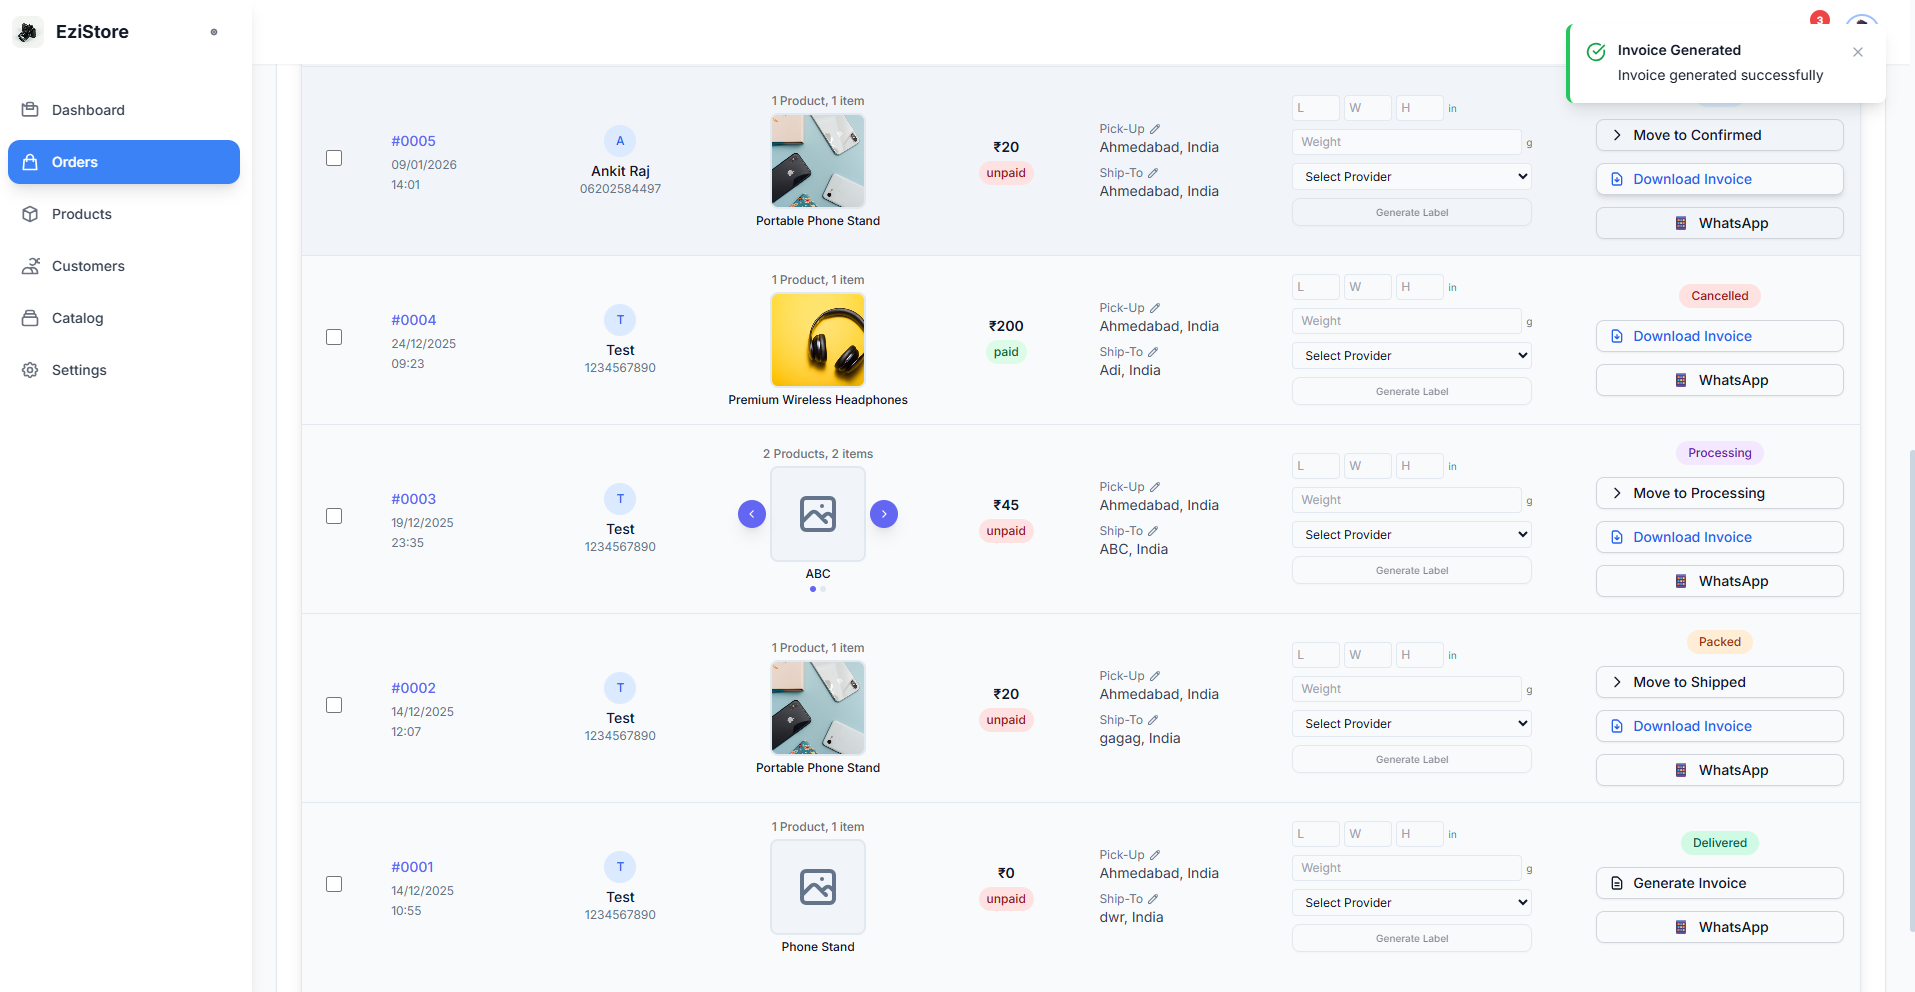
Click on the order you want to generate an invoice for.
Eziseller will create a formatted invoice with all order details.
Save the invoice as PDF or send it directly to your customer.
Label Generation
Create shipping labels for your orders quickly and efficiently.
Choose one or multiple orders that need shipping labels.
System creates shipping labels with customer address and order details.
Download and print labels for package attachment.
👥 Customer Management
Manage all your customer information in one centralized location.
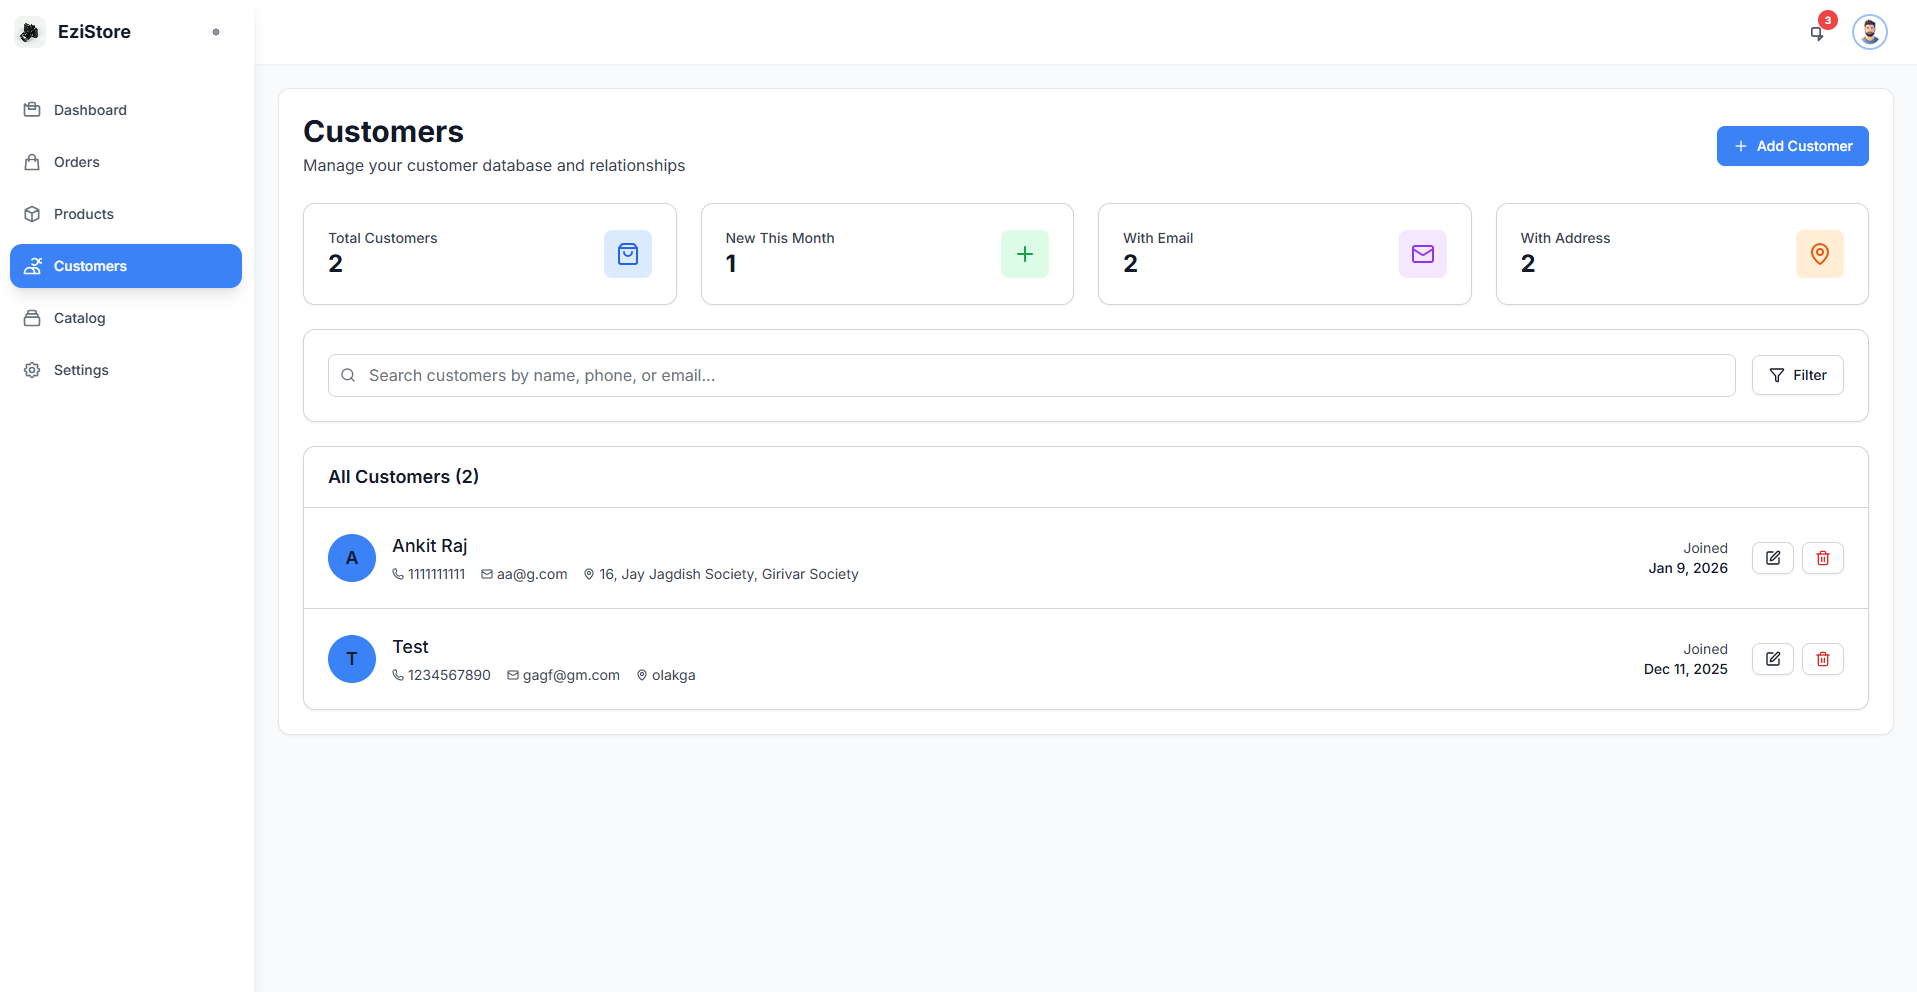
Customer Table Features
📊 Complete Overview
View all customer details at a glance
🔍 Search & Filter
Quickly find specific customers
📈 Order History
Track customer purchase patterns
✏️ Easy Editing
Update customer information as needed
Customer Information Displayed
- Customer name
- Contact information (email, phone)
- Shipping addresses
- Total orders placed
- Total amount spent
- Last order date
- Customer status (active/inactive)
Managing Customers
Adding a New Customer
Enter all relevant customer information.
Customer is now available for use in orders.
Editing Customer Information
Click on any customer row to view detailed information and make edits. Changes are saved automatically or with a Save button.
⚙️ Settings
Customize Eziseller to match your business needs through comprehensive settings.
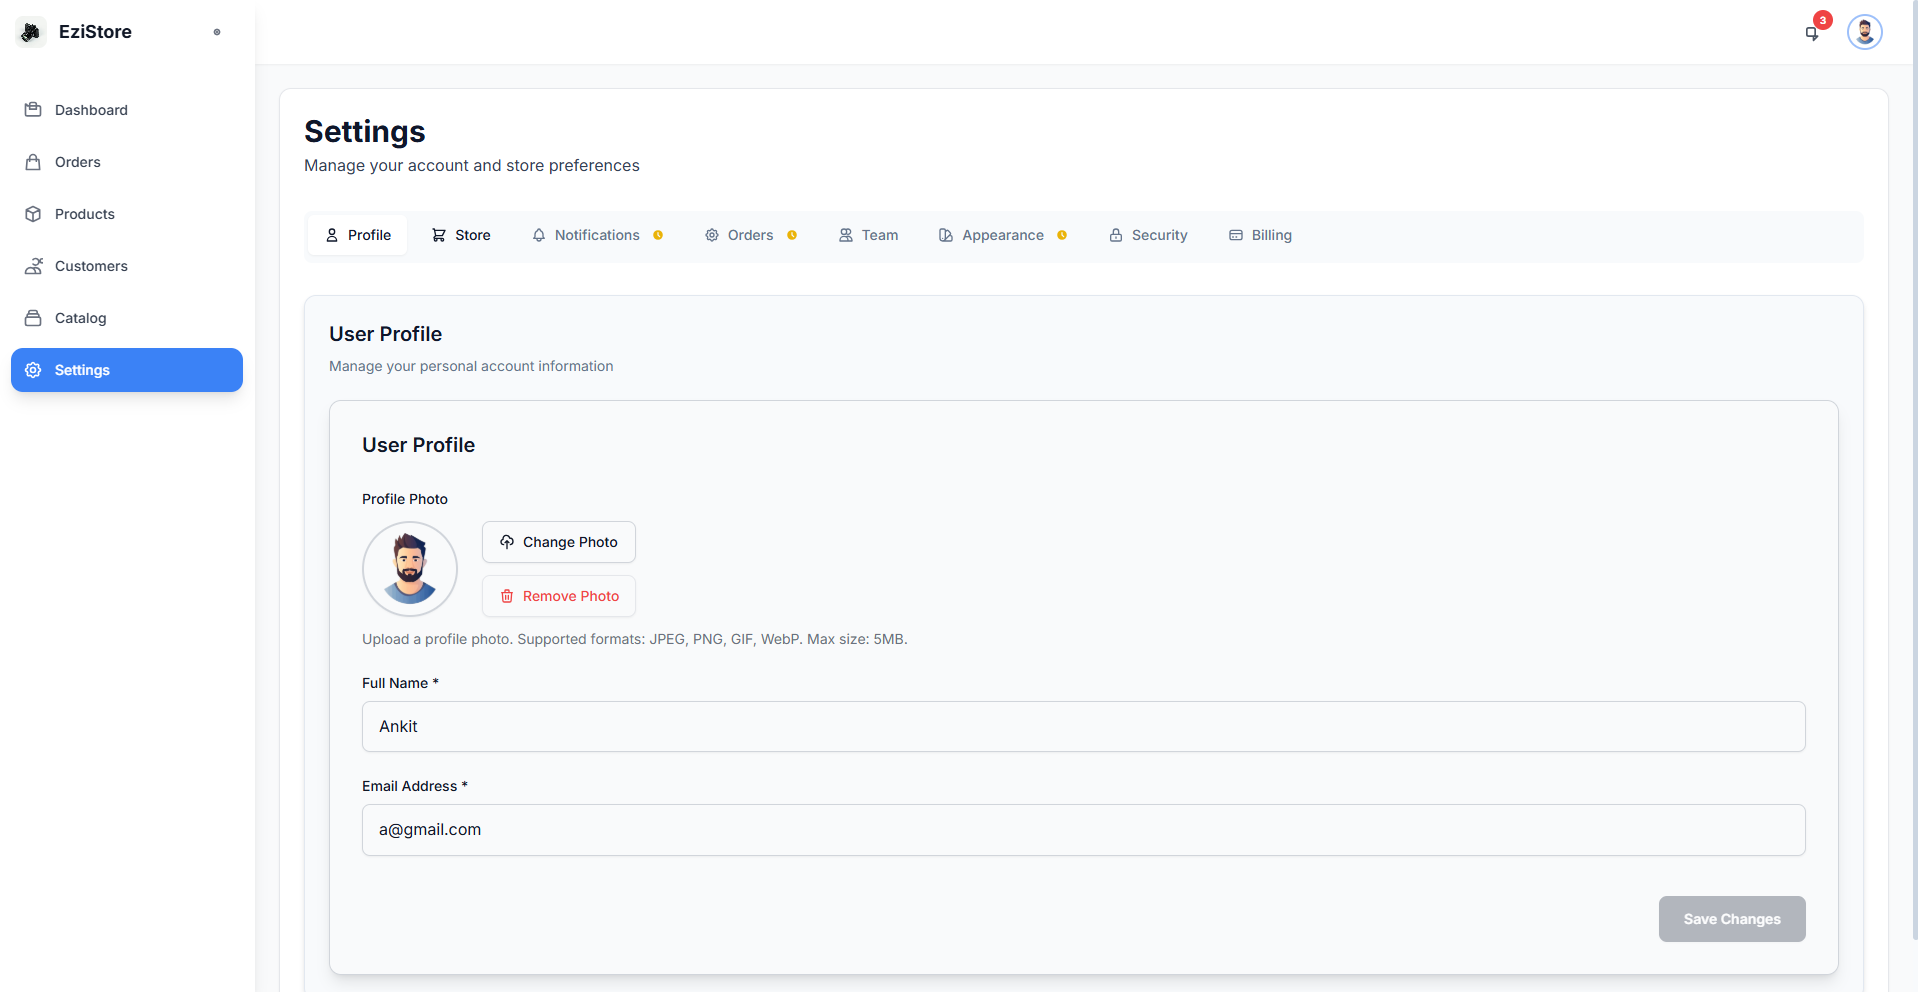
1. Profile Settings
Manage your personal account information and preferences.
What You Can Update
- Personal Information: Name, email, phone number
- Password: Change your account password
- Profile Picture: Upload your photo or logo
- Notifications: Email and SMS notification preferences
- Language & Timezone: Set your preferred language and timezone
- Two-Factor Authentication: Enable 2FA for enhanced security
2. Store Settings
Configure your store's operational parameters.
Store Configuration Options
- Store Name: Your business or store name
- Store Logo: Upload your brand logo
- Business Address: Physical store/warehouse location
- Contact Information: Customer support email and phone
- Currency: Default currency for pricing
- Tax Settings: Configure tax rates and rules
- Shipping Settings: Default shipping options and rates
- Return Policy: Set your return and refund policies
- Invoice Customization: Customize invoice templates
- Order Prefix: Set custom order number prefixes
Fill in all relevant fields for your business.
Click Save to apply your store settings.
3. Billing & Pricing
Manage your subscription, billing information, and view pricing plans.
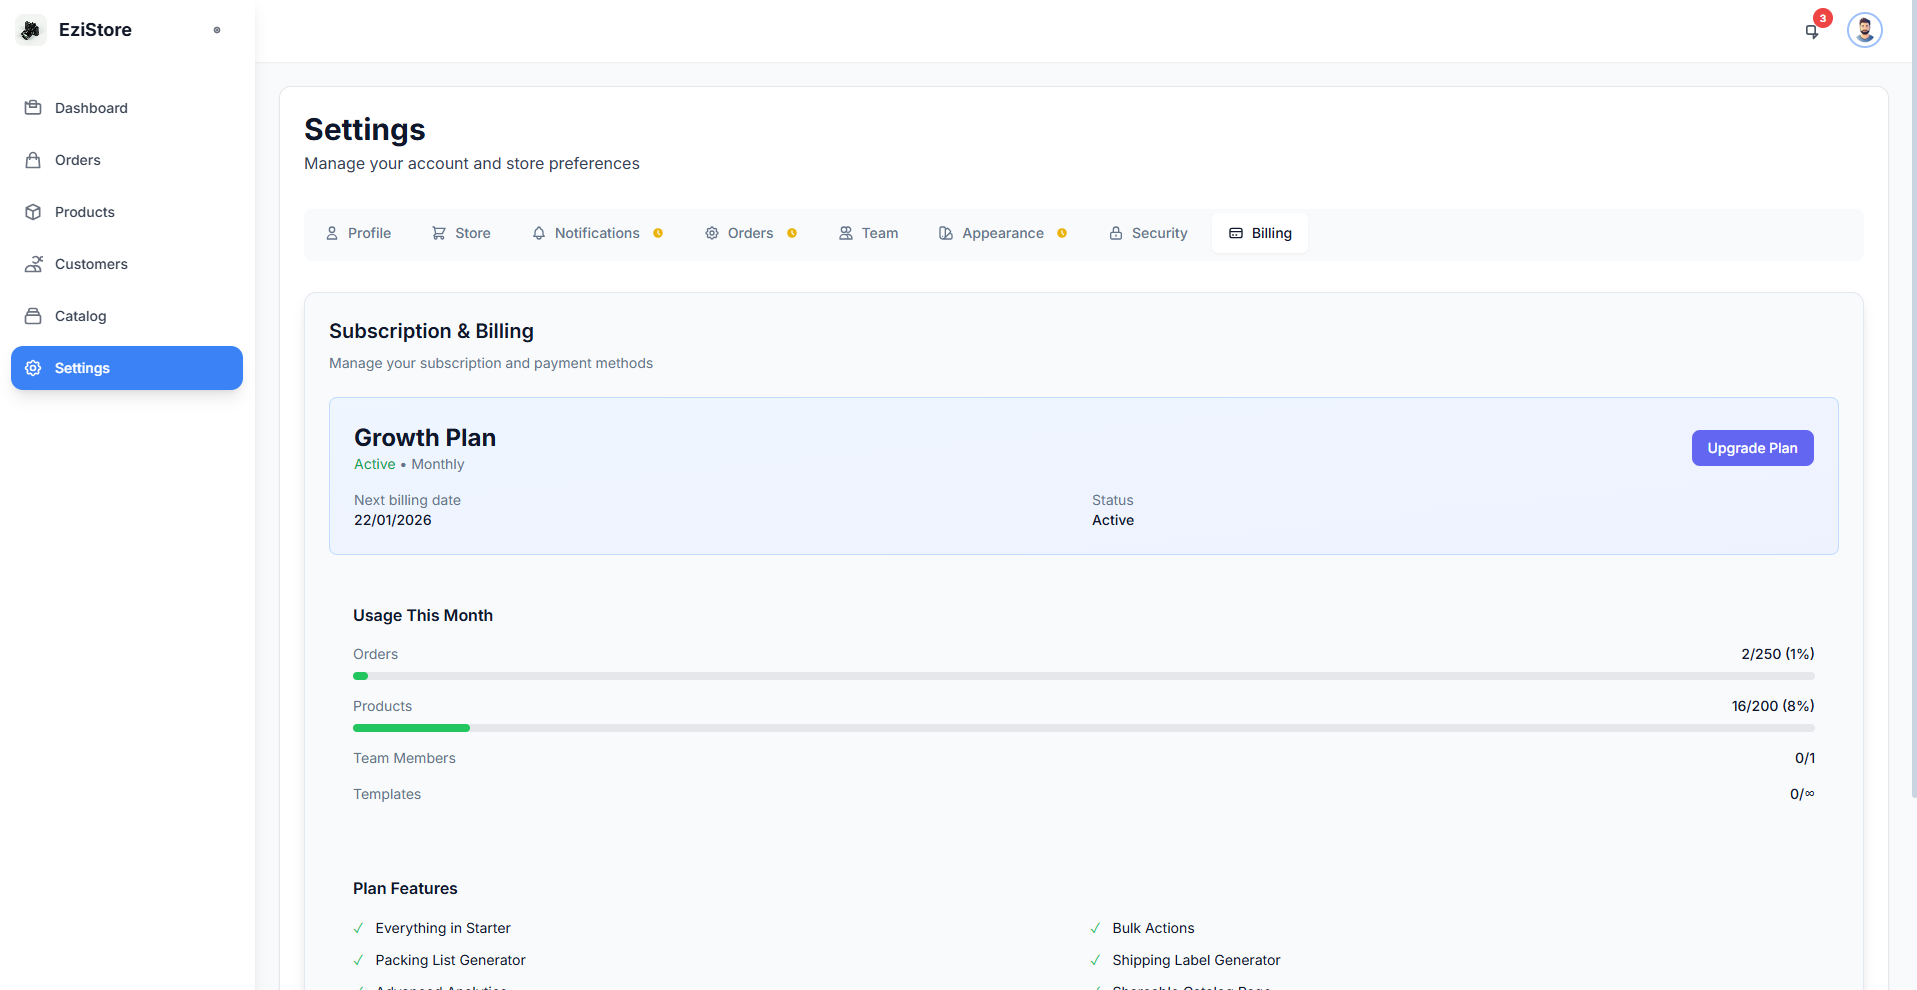
Billing Management
- Current Plan: View your active subscription plan
- Payment Method: Add or update credit card information
- Billing History: View past invoices and payments
- Usage Statistics: Track your monthly usage
- Auto-Renewal: Enable/disable automatic subscription renewal
Pricing Plans

Upgrading Your Plan
Compare features and choose the plan that fits your needs.
Enter payment details and confirm upgrade.
✨ Catalog Feature (Growth Plan & Above)
The Catalog feature is your personal product showcase on the web - similar to WhatsApp Business Catalog but with more power and flexibility!
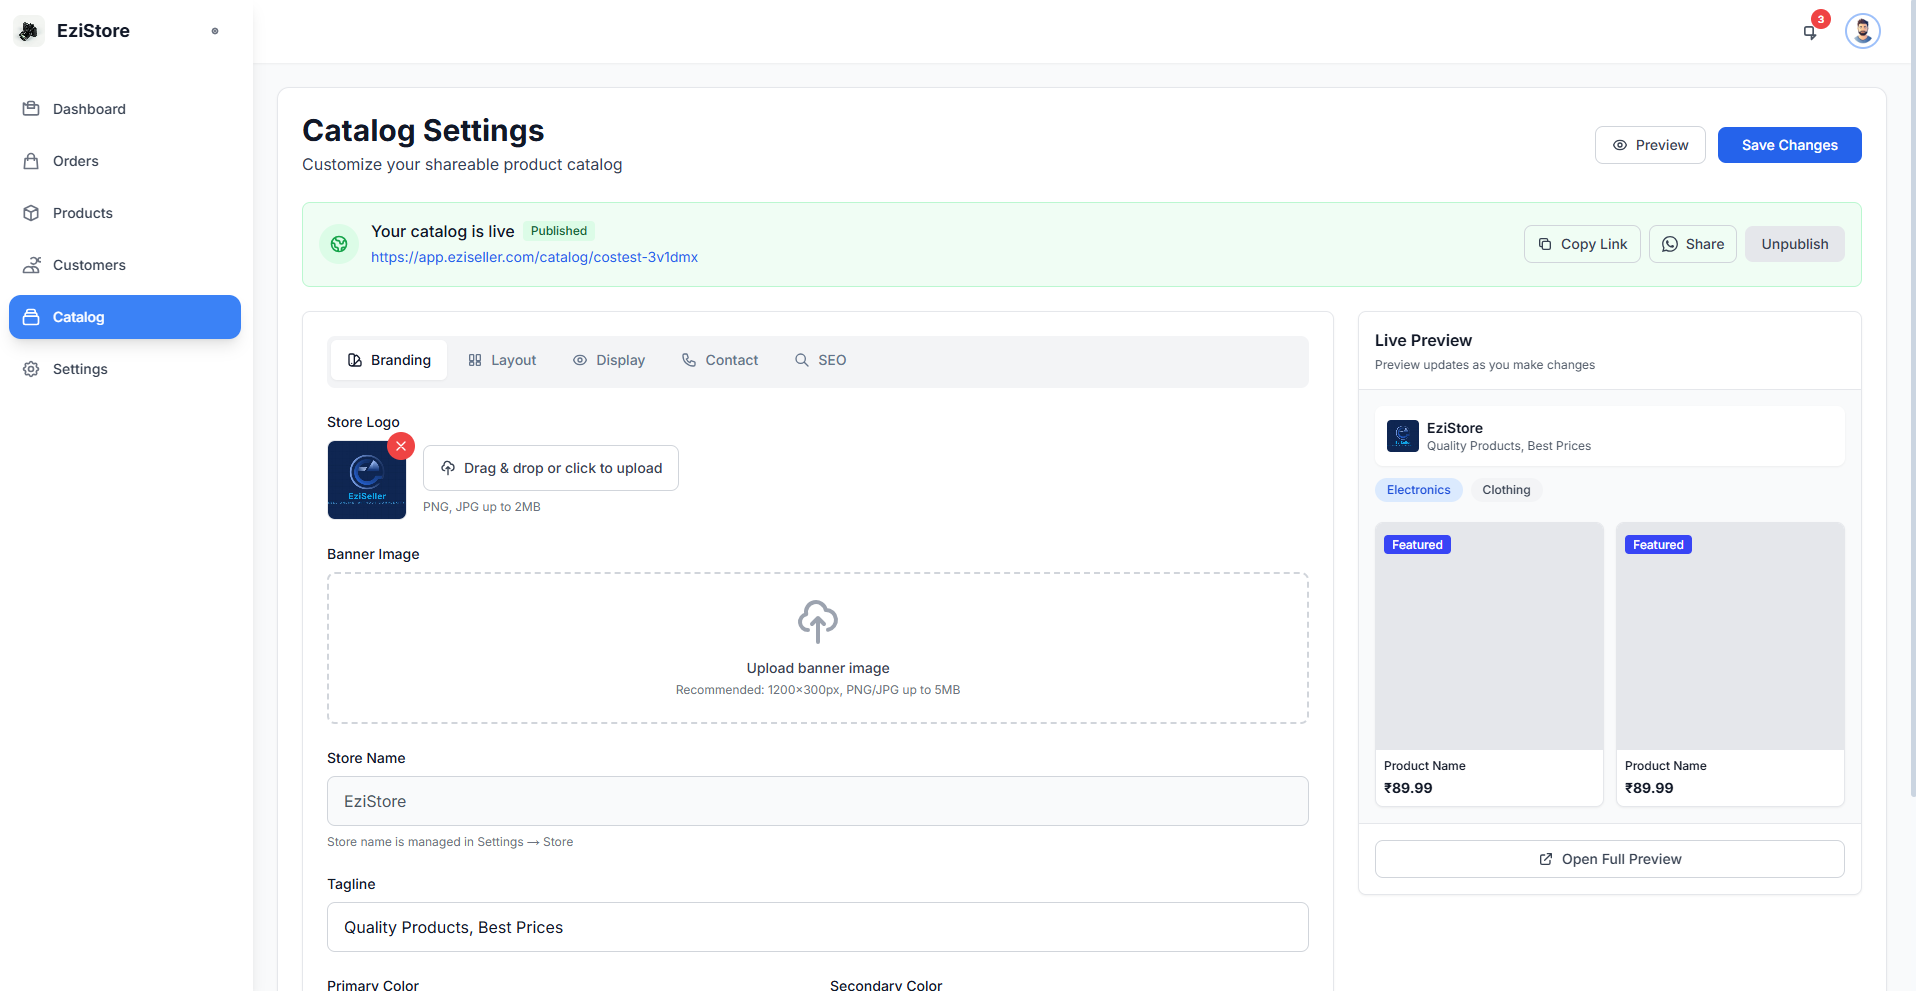
What is the Catalog Feature?
Every store on the Growth or Professional plan gets a unique public URL that displays all your products in a beautiful, mobile-friendly catalog. Think of it as your own mini-website that you can share anywhere!
Key Benefits
🔗 Unique Store URL
Get your own branded link like eziseller.com/yourstore
📱 Mobile Optimized
Perfect viewing experience on all devices
🎨 Professional Design
Showcase products with beautiful layouts
📤 Easy Sharing
Share one link across all social platforms
🛒 Direct Ordering
Customers can browse and inquire directly
🔄 Auto-Updated
Changes to products reflect instantly
How to Use the Catalog Feature
Available automatically on Growth and Professional plans.
Choose your unique store name in Settings.
All products in your inventory automatically appear in the catalog.
Post on Instagram, Facebook, WhatsApp, or any social platform!
Perfect for Social Sellers
As a social media seller, the Catalog feature is a game-changer:
- Instagram Bio Link: Put your catalog link in your bio
- WhatsApp Status: Share catalog updates in your status
- Facebook Posts: Include catalog link in product posts
- Direct Messages: Send one link instead of multiple product images
- Story Swipe-Ups: Direct followers to your full catalog
💡 Tips & Best Practices
For Order Management
- Use the paste method for bulk orders during peak seasons
- Always use customer prefill for returning customers to save time
- Generate invoices and labels immediately after confirming orders
- Keep order statuses updated for better tracking
- Review parsed data carefully before bulk import
For Product Management
- Use high-quality product images (recommended: 1000x1000px minimum)
- Write detailed, SEO-friendly product descriptions
- Keep your inventory counts accurate
- Use consistent naming conventions for easy searching
- Organize products into categories from the start
For Customer Management
- Keep customer information up-to-date
- Add notes to customer profiles for personalized service
- Segment customers based on purchase history
- Verify shipping addresses before order processing
For Catalog Success (Growth+ Plans)
- Keep your catalog updated with latest products
- Remove out-of-stock items promptly
- Use compelling product descriptions
- Add your catalog link to all social media bios
- Promote your catalog link in posts and stories
- Monitor which products get the most views
❓ Frequently Asked Questions
Q: Can I import orders from Excel or CSV?
A: Yes! Use the paste method to import orders. Simply copy your data and paste it into the order creation interface.
Q: How do I get the Catalog feature?
A: The Catalog feature is available on Growth (₹699/month) and Professional (₹1,499/month) plans. Upgrade from Settings > Billing to unlock it.
Q: Can I customize my invoices?
A: Yes! Go to Settings > Store Settings to customize your invoice template with your logo and branding.
Q: What happens if I downgrade my plan?
A: If you downgrade from Growth/Professional to Starter, you'll lose access to premium features like the Catalog. Your data remains safe.
Q: Is there a limit on the number of products I can add?
A: Limits depend on your plan. Check the pricing page for specific limits on each tier.
Q: Can I have multiple users accessing my store?
A: Team member access depends on your plan. Professional plan offers unlimited team members.
Q: How do I contact support?
A: Use the in-app chat support, or email us. Professional plan users get 24/7 priority support.
🆘 Getting Help
Support Channels
💬 Live Chat
Available in the app - click the chat icon
📧 Email Support
Reach out to our support team
📚 Help Center
Browse articles and guides
📹 Video Tutorials
Watch step-by-step video guides